Beginner-Friendly Guide to Calibrating Your Refractometer and Improving Accuracy
Alright, friend—let’s take a deep breath and start right at the beginning. If you’ve just unboxed your refractometer, it might look like a sleek, mysterious gadget with shiny glass, a prism, and maybe a few confusing numbers. Don’t worry—you’re not alone! Almost everyone feels that mix of excitement and nervousness the first time they hold one.
But here’s the cool part: once you learn how to calibrate your refractometer properly, you’ll unlock the key to readings that are sharp, reliable, and consistent. No more guessing. No more “hmm, that seems off.” Just pure confidence every time that light line crosses your scale or that digital screen flashes a number.
So, what exactly are we doing when we calibrate? Think of it like teaching your instrument what “perfect zero” looks like. You’re saying, “Hey, refractometer—this is pure water, this is our starting point. Every reading you take from now on will be measured from here.” Without that reference, your readings can drift. And drift equals inaccuracy.
Let me paint you a picture. Imagine you’re testing the sugar level in your homemade jam. You’re aiming for 68° Brix, but your refractometer hasn’t been calibrated for weeks. You take your reading—it says 68, perfect! You bottle the jam proudly, only to taste it later and realize it’s much sweeter than intended. Sound familiar? That’s what happens when calibration sneaks out the window.
Calibrating a refractometer isn’t some overly technical ritual reserved for lab scientists—it’s actually one of the simplest and most satisfying habits you can build. It takes just a few minutes, a drop of distilled water, and a tiny bit of attention. But the difference it makes? Huge. It’s the secret ingredient behind every accurate measurement—whether you’re checking salinity in your aquarium, the sugar content in fruit juice, or coolant concentration in a workshop.
Now, before we jump into the nitty-gritty steps, let’s take a moment to understand why calibration matters so much. Because when you know the “why,” the “how” suddenly feels effortless.
When you calibrate:
- You eliminate baseline errors caused by temperature shifts, dust, or handling.
- You ensure that every number you see actually corresponds to the real-world concentration.
- You build trust between you and your instrument (yes, it’s a relationship!).
And the best part? Once you get used to doing it, calibration becomes second nature—like checking your car mirrors before driving or tuning a guitar before playing. It gives you peace of mind that every result you get is anchored in precision.
So, whether you’re in your kitchen, greenhouse, brewery, or workshop, this guide will walk you through everything—step by step. You’ll learn what tools you need, how to set the right baseline, how to troubleshoot errors, and a bunch of practical tips and tricks to boost your refractometer’s accuracy and extend its life.
By the end, you’ll feel that wonderful mix of satisfaction and confidence—you’ll know your refractometer is telling the truth. And honestly, that moment when your readings line up perfectly? It’s like hitting the right chord in a song—it just feels right.
Alright, ready? Let’s roll up our sleeves and explore why calibration matters before we get hands-on with the process.
Why Calibration Matters
What does calibration of a refractometer mean?
Calibration means setting your refractometer so that it gives correct readings under a known condition—say pure water reading “0 Brix” or “0 % TDS” (or the equivalent in your scale). It’s like telling your instrument: “Hey, this is baseline zero.” Once that baseline is correct, all your subsequent readings have meaning.
Common errors and accuracy drift
Over time, even a good refractometer can drift—things like temperature changes, physical knocks, dirty prism surfaces, or even how you measure can alter accuracy. For example, one horticulture article warns that your refractometer may drift if it’s been dropped or exposed to huge temperature swings.
Imagine doing a big harvest, relying on Brix readings, and getting wrong numbers because your instrument wasn’t correctly calibrated—it would be a bit stressful, right?
Who benefits from accurate readings?
- Gardeners checking fruit sugar levels
- Brewers and winemakers measuring sugar or specific gravity
- Aquarists measuring salinity or TDS
- Metalworking or coolant shops monitoring fluid concentration
If your instrument is off by even a small margin, decisions based on those readings could be flawed. So yes, calibration matters.
Understanding Your Refractometer Basics
What a refractometer measures (refractive index / Brix / TDS)
A refractometer gauges how light bends as it passes through a liquid—the refractive index. That bending tells you something about concentration of dissolved substances.
Some common scales:
- °Brix – sugar percentage (weight/weight) in a solution.
- TDS (% Total Dissolved Solids) – particularly for brewed coffee or aquaculture.
- Specific Gravity (SG) – common in brewing.
Understanding which scale your instrument uses helps you calibrate and interpret properly.
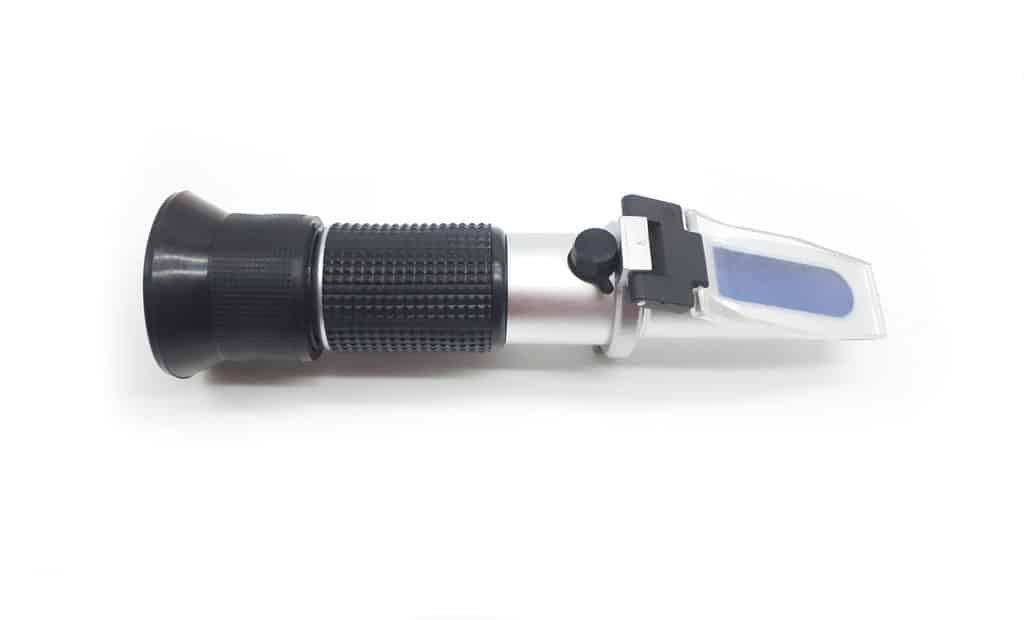
Key parts: prism, daylight plate, eyepiece (or digital sensor)
Most handheld analog refractometers have:
- A prism — where you place your sample.
- A daylight plate/cover that presses the sample evenly against the prism.
- An eyepiece where you look to see the scale line.
Digital models replace the eyepiece with a sensor/display and often have a zero-button.
Knowing these parts helps you keep everything clean and aligned.
Differences between analog vs digital models
Analog: You manually look into a scale, focus the eyepiece, and often adjust a screw.
Digital: Many readings automatically display, some even compute results, and with one-touch zero buttons. But both must be calibrated! According to BYO.com: “Digital refractometers usually have a ‘zero’ button … handheld needs adjustment screw.”
If you’re just starting out, pick a model that fits your comfort level and budget.
Preparing for Calibration – What You’ll Need
Clean surfaces and proper environment
Before you even place a drop of liquid, make sure:
- Prism and cover plate are clean, free of dust, oil, previous sample residue. Dirty surfaces = poor accuracy.
- The instrument and sample are at a stable temperature (ideally room temperature). Temperature fluctuations can throw off readings (more on this later).
- You’re in a well-lit area (natural or artificial) so you can clearly see the scale or sensor reading.
Taking a minute here will pay off big time.
Distilled/deionized water and/or calibration solution
You’ll need:
- Distilled or deionized water for zero calibration. Because you know exactly what its refractive index should read under ideal conditions.
- Optionally, standard calibration solutions (with known Brix/TDS values) if you want multi-point calibration. These might cost extra, but help for higher precision. com
Always use clean, fresh liquids.
Tools: pipette/dropper, soft cloth, screwdriver (if analog)
- Use a pipette or dropper to apply a consistent small drop of liquid — too much or uneven sample leads to bubbles or inconsistent layer.
- Soft lint-free cloth to wipe prisms and tools.
- If analog refractometer: small screwdriver or adjustment tool (often included) for calibration screw. Many manuals mention this.
Temperature and sample considerations
Temperature matters a lot. Many refractometers are calibrated at ~20 °C (68 °F). If you’re measuring in a hot workshop or cold field, temperature compensation or correction may be needed.
So: let your instrument reach ambient temperature, warm/cool your sample if needed, and avoid extreme thermal environments for accurate calibration.
Step-by-Step Calibration Process
Single-point (zero) calibration with pure water
Here’s the basic calibration process:
- Wipe the prism and cover plate clean and dry.
- Place a few drops of distilled/deionized water on the prism. Make sure it spreads evenly, no bubbles, no dry spots.
- Close the cover plate gently so the water layer is thin and uniform.
- Hold the refractometer up to a light source (analog) or wait for stabilization (digital).
- Check the reading: ideally it should be zero (0 °Brix) or 1.000 SG (or whatever your liquid’s baseline is). If it’s off:
-
- For analog: adjust the calibration screw/dial until it reads zero.
- For digital: press the zero button or follow manufacturer instructions.
-
- After adjustment, clean the prism and you’re ready to measure your sample.
Multi-point calibration (standard solutions)
If you want higher accuracy (especially for professional or industrial use), do this:
- After the zero point is set, apply a calibration solution with a known reading (for example, 10 °Brix or a known TDS value).
- Check if your refractometer reads the expected value. If not, some models allow multi-point adjustment or you note the offset.
- Document the calibration date, zero reading, and standard reading for future reference.
Analog adjustment vs digital zero button
- Analog: You physically turn a small screw/dial, look through the eyepiece, see the boundary line between light and dark, and align it.
- Digital: You’ll place the sample, wait for stabilization, press a “zero” or “calibrate” button, and the display stores the baseline. Simpler, but you still must ensure sample and instrument temperature match etc.
Verifying and documenting results
- After calibration, test with your sample and maybe test again with a second known standard to verify results.
- Write down date, instrument ID/model, calibration zero reading, standard reading (if used), any comments. This helps catch drift or problems later.
- If readings start shifting, you know when you last calibrated and can track stability.
Improving Accuracy – Tips & Tricks
Handling temperature shifts and Automatic Temperature Compensation (ATC)
As noted: temperature affects the refractive index. According to one source, refractometers with ATC will operate properly in the ~20–30 °C range, but outside that you may need corrections.
Here’s what you can do:
- Calibrate and measure in a stable, moderate temperature (~20-25 °C) if possible.
- If sample or instrument is warm/cold, let them adjust to ambient temperature for a few minutes.
- If your model lacks ATC, apply the manufacturer’s temperature correction table. These steps help improve accuracy and make you feel more confident in your readings.
Preventing contamination, bubbles, and residue
Small things matter:
- Residue from a previous sample can alter readings. Clean the prism thoroughly after each use.
- Bubbles or uneven sample film cause errors—ensure the fluid spreads evenly.
- Oils from fingers, dust, scratches on prism—avoid them. Even small damage or dirt affects accuracy.
In short: treat your refractometer with care; it will reward you.
Using correction factors for different sample types
If your sample is more complex than simple sugar-water (for example juicing fruits, wort in brewing, coolants, salty water) you may need to apply correction factors.
For instance:
- Some fruit juices contain other dissolved substances besides sugar, giving “false” Brix readings. One horticulture article notes you should view Brix as an empirical number in such cases.
- In brewing, using a hydrometer confirmation helps adjust for wort differences.
When you know your sample type deviates from the basic model, factor that in and note it.
Regular calibration intervals and maintenance
Calibration isn’t a one-and-done thing.
Best practice:
- Calibrate before each session if high precision matters.
- At the very least, calibrate at the start of each day or week if used often.
- Inspect your refractometer periodically: check for scratches, damage, prism wear. One manual states that condition of device affects calibration.
Storage, transport and optical checks
- Store in its case, protect from shocks or extreme humidity. One guide mentions that mishandling and temperature swings can throw calibration off.
- After transport, re-calibrate before critical measurements.
- Periodically check optical clarity: Ensure prism isn’t scratched, eyepiece focus works, digital display is clear. A blurred or unclear reading suggests you might need maintenance. Reddit users report similar issues when they neglected this.
All these little practices add up to big gains in accuracy and reliability.
Troubleshooting Common Problems
Reading doesn’t hit zero after calibration
If you set it up with pure water and it doesn’t read zero (or the equivalent baseline):
- Check the prism surface for residue or damage.
- Ensure no bubbles and that the water layer is uniform.
- Confirm the instrument is at the correct temperature with the distilled water.
- For analog: Is the calibration screw reached its limit or stripped?
- If digital: Check whether you used the correct zero button or followed instructions.
If still off: It might need professional recalibration or servicing.
Bubbles or uneven sample film on prism
If you see uneven spread, bubbles, or corners of prism dry: your sample film is inconsistent. This can distort light path and shift reading. Best fix: wipe prism clean, apply correct size drop, press cover gently to spread, wait briefly, then read. One source warns about these issues.
Readings drift over time or after shock
If your readings gradually shift over time, or after you drop the instrument, you might have internal misalignment or damage. According to manuals: rough usage can knock it out of calibration.
Solution: calibrate again; if still inconsistent, contact manufacturer or consider replacement.
Mis-match between refractometer and other measuring tools
Sometimes you compare readings from hydrometer vs refractometer and they don’t align. For example, brew community posts mention this.
Why? Because each instrument measures slightly differently or needs correction factors.
Approach:
- Ensure both instruments themselves are calibrated.
- Understand their scale and limitations.
- Use manufacturer’s correction tables or empirical adjustments.
- Document readings across time to see trends rather than fixate on the absolute spot.
This approach helps you avoid frustration and builds confidence.
Best Practices for Different Applications
Brewing / winemaking – sugar content and Brix
If you’re measuring sugar content (juice, wort, must):
- Calibrate with distilled water at 0 °Brix.
- Consider measuring at consistent temperature (close to 20-25 °C).
- If wort has other solutes (maltose etc.) adjust via hydrometer confirmation.
- Document your readings along with temperature, calibration date, etc.
This helps predict Brix trends, sweetness, and fermentation potential.
Salinity / aquaculture – specific gravity and TDS
For measuring salinity/TDS (aquariums, marine tanks):
- Use a refractometer designed for that range (e.g., salinity-specific scale).
- Calibrate with RO/DI (reverse osmosis/deionized) water at 0% TDS or baseline.
- Regularly re-check calibration especially if you’ve moved the instrument from dry lab to humid tank room.
- Track calibration date and readings so you can catch drift early.
Industrial / coolant / metalworking fluids
When measuring coolant concentration, additive levels, etc:
- Calibrate with the same water you’ll use to mix fluids (because your water may have dissolved minerals already) — as one industrial article highlights.
- Use standard solutions if available.
- Ensure sample temperature matches calibration temperature.
- Apply correction if your fluid mixture includes multiple solutes beyond basic sugar or salt.
Choosing the right refractometer for your application
- Choose a model with ATC if you’ll be working in variable temperatures.
- Ensure the measurement range matches your application (e.g., 0–20 °Brix, 0–35 ppt salinity, etc.).
- Prioritize build quality (solid prism, good optics, sealed construction) if you’ll use it often.
- Consider digital models if you prefer read-outs and fewer manual adjustments; analog can be cheaper but demands more manual care.
Choosing the right tool helps your calibration and accuracy efforts pay off.
Summary Checklist & Friendly Reminders
Quick calibration checklist you can use every time
- Clean prism & cover plate (no residue, no scratches)
- Let instrument & sample reach ambient temperature (~20-25 °C)
- Use distilled/deionized water (or appropriate standard)
- Apply a few drops evenly, avoid bubbles
- Close cover plate gently / apply sample properly
- For analog: adjust screw until zero reading. For digital: press zero button/check baseline
- Optional: check with known standard solution
- Document date, instrument ID, zero reading, standard reading
- After measurement: clean prism, store instrument in case
- Re-calibrate at start of each session/day/week depending on use
- Use this each time and you’ll build a strong routine.
Final encouragement and how to keep improving
You’re doing the right thing by giving calibration proper attention. When your readings are accurate and consistent, it’s such a satisfying feeling—it makes me feel more confident and less worried about making decisions based on flawed data.
Keep practicing the calibration steps, incorporate the tips, handle your refractometer with care, and you’ll soon see improved readings and better outcomes—whether you’re brewing, doing aquaculture, working industrial or just measuring for fun.
Calibration isn’t glamorous, but it is the foundation of reliability. And once your foundation is sound, everything else flows more smoothly.
Finding Clarity: Your Journey Toward Perfect Refractometer Readings
So here we are—the final stretch of your refractometer journey. You’ve learned what calibration is, why it matters, how to do it step by step, and even how to troubleshoot those pesky “why is this off?” moments. You’ve also picked up a few pro tips for improving accuracy, maintaining your instrument, and keeping your readings trustworthy over time.
But more importantly, you now understand that calibration isn’t just a routine—it’s a ritual. It’s that small, intentional act that separates guesswork from precision, and uncertainty from confidence. Every time you take a few moments to clean the prism, add that perfect drop of distilled water, and adjust the reading to zero, you’re not just tuning an instrument—you’re tuning your trust in your own data.
Can you imagine how it feels to measure with total certainty? To know that when your refractometer says “12° Brix” or “1.026 SG,” that number truly reflects what’s in your sample? It’s empowering. It’s like having clear vision after fogged-up glasses—you can finally see what’s really going on in your liquid world.
And that’s the beauty of calibration. It’s not glamorous, but it’s grounding. It’s a habit that builds discipline and accuracy into your process—whether you’re crafting a beautiful batch of mead, testing the ripeness of fresh fruit, or ensuring the right coolant concentration for precision machining.
Here’s the thing: refractometers, just like people, need a bit of care to perform at their best. Keep them clean, protect them from harsh temperature changes, and give them that little calibration check before use. Do that, and your instrument will reward you with reliability for years.
If you’ve made it this far, give yourself a pat on the back. Seriously, not everyone takes the time to learn this level of detail. But you did—and that says something. It shows you care about quality, precision, and understanding the tools that make your craft or science better.
So next time you reach for your refractometer, take a moment to smile. You’re not just measuring sugar, salt, or solution—you’re measuring your commitment to accuracy, your patience, and your growth as a maker, grower, or experimenter.
Calibrate often. Measure mindfully. Trust your readings.
And remember—great results always start with great preparation.
Here’s to crystal-clear readings, flawless data, and that satisfying moment when your numbers finally make sense. You’ve got this.
Please read more about the best refractometer.
FAQs
How often should I calibrate my refractometer?
It depends on how frequently you use it and how critical your measurements are. If you’re using it daily or for precision work, calibrate at the start of each session or day. For more casual use, calibrating weekly or before each major batch is wise. Because instrument drift, temperature changes or contamination can accumulate.
Can I use tap water instead of distilled water for calibration?
It’s not recommended. Tap water has dissolved minerals/ions that alter refractive index slightly. For zero calibration you want a fluid with a known, stable baseline (like distilled or deionized water). Using tap water can introduce slight error.
My readings keep shifting even after calibration—what is wrong?
Possible causes:
- Temperature mismatch between instrument and sample.
- The prism or cover plate is dirty, scratched or has residue.
- The instrument may have been knocked or mis-aligned internally.
- Sample film has bubbles or isn’t spread evenly.
Go back through cleaning, temperature, calibration steps. If drift persists, consider servicing the instrument.
Do I need multi-point calibration or is zero calibration enough?
For many hobby or moderate accuracy uses, a single-point zero calibration is enough. But if you require higher precision (industrial, research, high-volume production) then verifying with known standard solutions (multi-point) helps improve confidence and detect non-linearity or scale shift.
Can I measure any liquid with a refractometer once calibrated?
Not exactly. Calibration sets baseline, but different sample types (sugar solutions, salt water, coolant mixtures) each have different refractive properties. You may need correction factors or specific instrument scales for your sample type. For example, fruit juices have other solutes so Brix reading is empirical only.
So, yes you can measure many liquids, but you must interpret results within context of sample composition and instrument design.