Measuring an object’s inside diameter, outside diameter, and depth can be a bit tricky. And if you want your measurements to be precise, depending on a professionally built digital caliper will be the most logical choice. These amazing tools can give an accuracy level of up to 0.0005 inches. But what are the best uses of digital calipers? In today’s article, we’ll talk about just that.
There are a number of calipers available out there. You can get your hands on dial calipers, vernier calipers, or spring calipers. But digital calipers offer an amazing feature like nothing else. And that is the ease of use and comfort. Instead of looking at a dial indicator, you can see the readings clearly over a digital screen. Though there is both a cheap and expensive version of this handy tool ranging from $20-$100, there isn’t much difference between cheaper calipers and the expensive ones.
Today we’ll learn about how you can take good care of your digital calipers and how you can reduce the error margin. We’ll also talk about the best usage of digital calipers and share some tips as well. So without any more delay, let’s hit the road.
The Best Ways to Use Digital Calipers
Let’s have a look at how we can properly use the digital calipers to get an accurate measurement.
Outside Measurement
You can use the outside jaws of digital calipers to determine the external dimension of any object. To properly do that, first, you have to make sure that the object is parallel to the jaws. If that’s not possible, at least make the dimension that you are trying to measure parallel to the caliper’s jaws. You can also get accurate readings on the actual thickness of any metal plastic sheet. In that case, the object/sheet has to be perpendicular to the jaws.
In a nutshell, the key here is to make the material dimension parallel to the jaws to increase the level of accuracy. You can also measure the distance between holes if they are close enough.
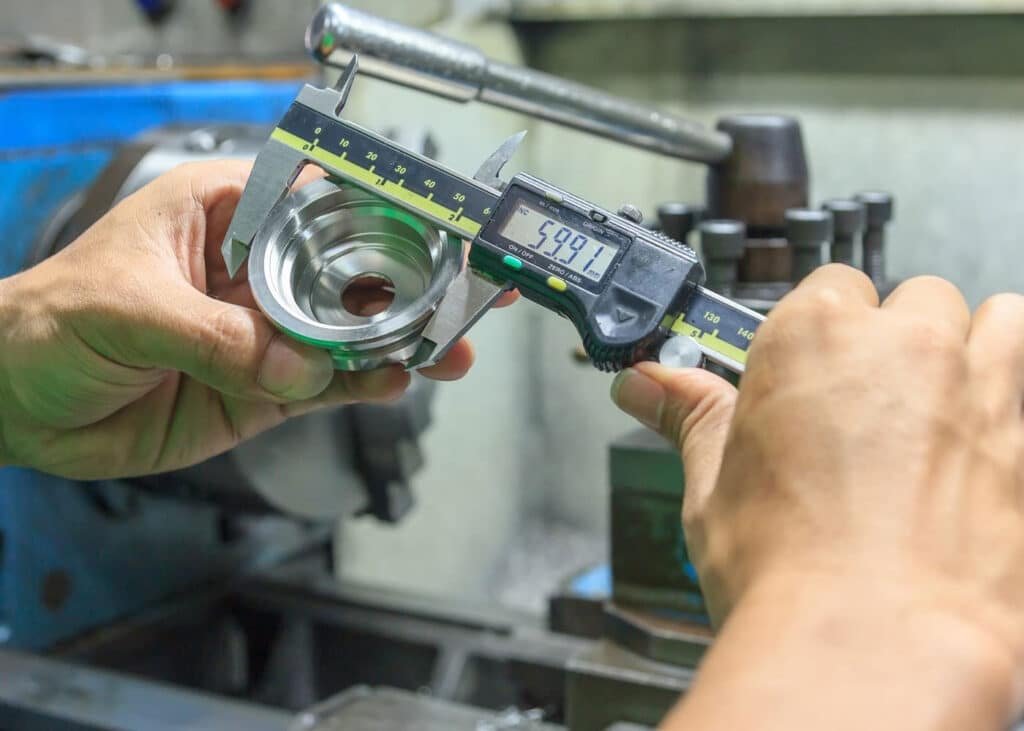
Inside Measurement
The inside/shorter jaws of digital calipers are really helpful to take internal measurements. You can get the exact measurement of the internal dimension/radius of a pipe, a hole, and many other things. The measurement process is identical. You have to make sure that the dimension you are trying to measure is parallel to the internal jaws of the digital calipers. First, enter the jaws inside whatever you want to measure, and start rolling the scale outwards till the jaws get stuck. The accurate measurement of that dimension will be shown over the digital/LCD Display.
Depth Measurement
Almost all types of calipers pose a nifty trick to measure small depths among the additional features. This technique is pretty useful for in-depth/thickness measurements. You can use this technique to measure the material thickness and/or depth of any sort. To do this, you have to put the dimension you are trying to measure against another plain surface as a reference. Don’t forget to make sure that the calipers are perpendicular to the surface. Now, use the depth gauge to read the difference between the two surfaces. That’s your measurement.
Step Measurement
If you want to take a partial measurement of a dimension, this is the best way to do it. The main reason you are using digital calipers is the proof that you want the process to be efficient yet effortless, right? To take precise measurements of any length, just use the step gauge to measure the distance between one edge and the next edge above it, and you are done. The final reading will be displayed over the digital screen. A pro tip here, don’t forget to “zero” the scale in case you need it. It’s just as easy as it sounds.
Comparative Measurement
One of the many core features of a digital caliper is the ability to record a measurement and compare it with another. And it’s as easy as it can get, just a push of a button. By zeroing the calipers in a particular place, you can immediately take other measurements and compare the reading against the previous one. First, take the inside measurement/the measurement you want to compare and press the “zero” button. The digital display will show the changes. Now use the inside/outside jaws and get the second reading. You’ll be able to see the difference in the extra-large LCD display.
Reduce The Error Margin
To err is human. So it’s natural and safe to assume that you’ll make some too. It is inevitable. But we can prepare for this. We can strengthen the chance of increasing the accuracy of this type of caliper if we learn to use the “zero” button perfectly. Specially zeroing the calipers before taking measurements helps to get a better reading every time. You might see some negative reading on the digital indicator where it shouldn’t. Just use the zero button and start measuring. It’s that simple.
Also, we recommend using the Auto-off feature/Automatic shutdown feature to save the battery life of the device. Try not to use the tool under extreme/harsh conditions like heat, pressure, etc. You can change the metric units into imperial whenever you want. If you want more comfort using a tool, the expensive ones provide a better finish and comfort where an affordable option just gets the job done. So plan accordingly. The cleaning process is also easy with the costly ones.
Bonus Tips
Here are some tips and tricks for you to get more precise measurements and to take better care of these versatile pieces of tools.
- If you are using cheap calipers, don’t forget to zero the tool every time you turn the device on.
- The measurement is pretty much accurate with all types of the caliper.
- Choose the tool you’re most comfortable working with.
- Tighten the locking screw after making a measurement to save or transfer it.
- Regularly check for signs of wear and tear, such as scratches or burrs, on the caliper jaws and scale that could affect the accuracy of your measurements.
- Use the multiple modes of the electronic caliper where you need them.
- Calibrate calipers once a year to ensure accurate measurements.
- Buy premium quality tools if you value ease and comfort over the money.
- If the calipers didn’t come with a calibration certificate, calibrate them after the purchase.
- If you have a higher probability of breaking the tool, we suggest you go for the cheaper one
- Keep the device out of the reach of children and pets. It may have sharp edges that can be dangerous.
Over to You
Most decent digital calipers have an accuracy rate of within +/-0.001″ (0.02 mm). Nowadays, they offer automatic conversion between standard and metric measurement systems, an easy-to-read digital display, and a couple of essential functions that you’ll need. Whether you go for fancy calipers or a cheap one, the main goal of this article is to pass on the information needed to take care of this amazing tool properly through the best use.
Thanks for reading this far. I hope this article proves to be helpful to those in need. I wish you a great day. Happy measuring to you.