Introduction: Why Accuracy Matters More Than You Think
Have you ever measured something—say a metal rod, a printed part, or a bolt—and thought, “Huh, that can’t be right”? Yeah, it’s frustrating. You double-check, remeasure, maybe scratch your head for a while… only to realize your digital caliper was off the whole time.
Been there. Done that.
See, digital calipers are fantastic tools. But they’re not magic. They rely on proper zeroing and occasional calibration to give you readings you can trust. And when those numbers are off, even by a tiny bit, things can go very wrong—especially in precision work like machining, woodworking, reloading, or engineering.
But here’s the good news: you can fix that easily, right at home. And today, I’ll show you how—step by step. Whether you’re a weekend DIYer or a seasoned machinist, you’ll learn how to zero and calibrate your caliper for accurate readings, every time.
Let’s jump in.
Understanding Your Digital Caliper
Before we dive into calibration, let’s quickly cover what a digital caliper actually is—and why zeroing even matters.
What Is a Digital Caliper?
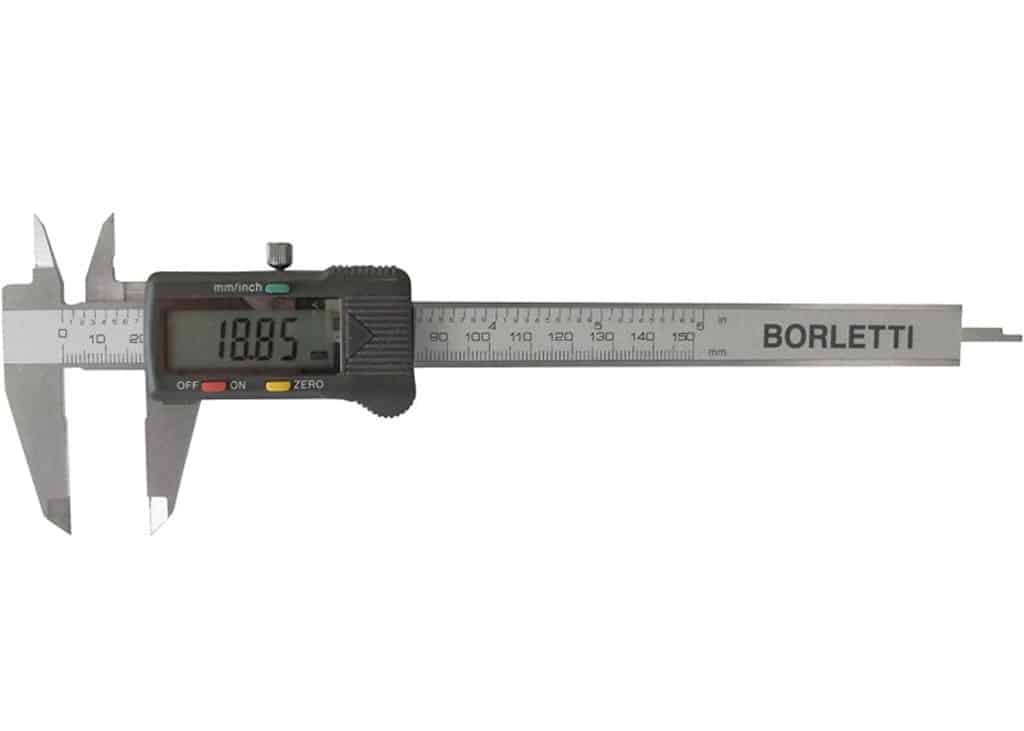
A digital caliper is a precision measuring tool used to measure internal, external, step, and depth dimensions. It’s the modern cousin of the classic vernier and dial calipers—but with a digital LCD readout that makes it much easier to use.
The main parts include:
- External jaws – For measuring outside diameters (e.g., a bolt or pipe)
- Internal jaws – For measuring the inside of holes or slots
- Depth rod – For measuring hole or recess depth
- Main scale and sliding jaw
- LCD display – Shows the reading
- Zero button – Resets the reading to 0.000
- Unit button – Switches between inches and millimeters
Pretty handy, right?
What’s the Difference Between Zeroing and Calibrating?
This is where many people get confused. So let’s clear it up.
- Zeroing your caliper sets the current position as “zero.” For example, when the jaws are fully closed, the display should show 0.000. If it doesn’t, you hit the Zero button to reset it.
- Calibration, on the other hand, means checking whether the caliper is actually accurate—i.e., does it measure a 1-inch gauge block as 1.000 inches? If not, you’ll need to calibrate it or send it in for professional adjustment.
Think of it like this:
Zeroing = “Start line”
Calibration = “How accurate is my measuring tape?”
Both are important—and both are easy to do with the right process.
Why Digital Calipers Lose Accuracy
Even a premium caliper from Mitutoyo or Starrett can give you incorrect readings over time. Here’s why.
Common Reasons for Inaccuracy
- Dust and debris
Tiny bits of dirt, oil, or metal shavings can get lodged between the jaws or on the rail, causing improper closure and misreadings. - Low battery voltage
When the battery is weak, the electronics may flicker, freeze, or display inconsistent values. - Temperature changes
Calipers expand or contract with temperature. Even a few degrees difference can affect measurements at high precision levels. - Mechanical wear
With repeated use, the jaws can loosen or wear unevenly—especially in cheaper models. - Improper storage
Throwing your caliper into a drawer without its case? Not a great idea. Impacts and dust buildup can damage internal parts. - Magnetic interference
Certain work environments (like around magnets or motors) can disrupt digital sensors.
Signs Your Caliper Needs Re-calibration
How do you know it’s time? Here are some common red flags:
- The display reads something other than 0.000 when jaws are fully closed
- Your measurements are off by more than 0.01mm/inch compared to known values
- The display flickers or resets randomly
- The jaws feel sticky or misaligned
- You get different readings from the same object
If any of these sound familiar, don’t worry. You’re not alone—and we’re about to fix it.
What You’ll Need Before You Begin
Let’s get set up. Here’s what you’ll want to have on hand before you start zeroing or calibrating your digital caliper:
Essential Tools:
- Clean microfiber cloth or alcohol wipes (for cleaning the jaws)
- Calibration standard – This can be a gauge block, feeler gauge, or precision part with a known dimension
- Flat surface – Like a granite block or even a stable desk
- Fresh battery – Digital calipers act weird when power is low
- Protective case – For long-term storage after you calibrate
Optional:
- Compressed air – Great for clearing dust from tight spots
- Magnifying glass or lamp – Helps when inspecting for dirt or wear
That’s it! You don’t need a fancy lab to get accurate results—just the right approach.
How to Zero Your Digital Caliper (Step by Step)
Prepare Your Workspace
- Dust-free surface — wipe your bench or table clean
- Good lighting — helps spot debris
- Keep your cloth or air can handy
Clean the Jaws
- Wipe external jaws gently with microfiber cloth.
- Use compressed air or soft brush for internal jaws and slide.
- Can you imagine how satisfying that squeaky-clean feeling feels? It sets the stage.
Close the Jaws Slowly
- Let the jaws meet naturally.
- Look closely—no light should pass between them.
- If you do see light, wipe again until they close flush.
Press the ZERO Button
- Hit it once, gently—don’t hold it down too long.
- Watch the display reset to 0.000 or 0.00 mm.
- It made me feel so relieved—but wait, this is just the beginning!
Verify with a Known Object
- Use a gauge block or precision shim.
- Hold the block gently between clean jaws.
- Ensure the reading matches exactly.
- If yes → awesome! If no → re-zero or proceed to calibration.
Zero for Other Parts
- Internal jaws: Slide closed, press ZERO.
- Depth rod: Retract fully, press ZERO.
- It fills me with joy seeing all modes align to zero.
Troubleshooting Zeroing Issues
| Problem | Possible Cause | What to Do |
| Doesn’t zero | Debris, low battery, mechanical jam | Clean, replace battery, check movement |
| Reads 0.01–0.02 mm when closed | Sticky jaws or scale issue | Clean, re-zero |
| Display flickers | Weak battery | Swap the battery |
Friendly phrase: Keep going—you’re nearly there!
How to Calibrate Your Digital Caliper
What Calibration Actually Means
- Zeroing = setting baseline
- Calibrating = verifying against a precise standard
- Skipping calibration is like driving without checking tire pressure.
Gather Calibration Standards
- Gauge blocks (ISO/ASME certified): best accuracy
- Feeler gauges, hardened steel rods, coin/shims—good for basic checks
- Example: a 1.000-inch gauge block with known (+/- 0.00005 in) accuracy
Perform the Calibration
- Zero your caliper as covered above
- Measure the gauge block/jig slowly and steadily
- Hold for 2–3 seconds to allow display to stabilize
- Record the result — should match standard exactly
- Repeat measurements at different points for consistency
- Check internal & depth modes too
Analyze the Results
- Exact match → caliper is accurate.
- Offset -> e.g., reads 1.002″ → you’ve detected +0.002″ error
- Run multiple tests (e.g., at 0.5 in, 1 in, 1.5 in) to check linear error
Adjust or Send for Professional Calibration
- Cheaper models: no internal adjustment → send to lab
- Pro-level models (Starrett, Mitutoyo): may allow user adjustment
- Without adjustment → note the error for compensation
When to Use Professional Calibration
- Working to tight tolerances (±0.001″)?
- ISO 9001 or other standards required
- Certifies accuracy traceable to national standards
Professional labs offer traceable certificates—great for formal quality control.
Maintenance Tips to Keep It Accurate
Daily Care
- Wipe jaws clean after each use
- Retract depth rod and slide before storing
Storage
- Always store in case
- Keep dry, avoid chemical solvents
- Don’t toss into cluttered toolbox
Temperature Control
- Avoid measuring hot/cold parts
- Let caliper adapt to ambient temperatures
Battery Hygiene
- Use quality CR2032 or LR44 batteries
- Store caliper power-off if unused for months
- Replace annually or when display dims
Handle with Respect
- Don’t force jaws past limit
- Avoid hitting metal parts together
- Dropping = recalibration time
These small steps preserve precision—and your confidence.
Emotional Benefits of Precision
There’s something deeply satisfying about that perfect 0.000 readout. It signals control. It feels clean. It makes projects flow.
It fills me with joy when parts align without fuss. That moment of sync—tool, mind, and result—feels almost emotional.
Precision builds trust in yourself. It reduces stress. It makes craftsmanship feel good—not just look good.
And when you share that finished piece with someone? They’ll see the care you put into it.
Conclusion
You did it—you’re now equipped to zero and calibrate your digital caliper like a pro:
- Zero daily—and especially after battery change or mode switch
- Calibrate with standards occasionally (6–12 months or before critical jobs)
- Maintain it carefully—clean, store, battery-check
Your measurements are now trustworthy. Your projects will reflect that. And you’ll experience that wonderful sense of precision… every time.
Keep going. Keep measuring. Keep elevating your craft.
FAQs
- How often should I calibrate my caliper?
- Amateur/hobbyist: every 6–12 months
- Professional/high-precision: every 6 months or per job
- Can feeler gauges replace gauge blocks?
- Only for informal checks. Gauge blocks are more precise.
- Zeroing vs power off—does it matter?
- Zero resets baseline each session. Power off saves battery but you’ll need to re-zero next time.
- What brand caliper holds calibration best?
- Mitutoyo, Starrett, and Fowler offer high durability and accuracy retention.
- Do internal jaws need special care?
- Yes—clean them after use and zero regularly to avoid buildup errors.
please read more about the best digital caliper